 Loading... Please wait...


- Home
- Signage and Decal
Signage and Decal
Interior Signage
Sublimation Metal Products
Chalkboard Chart | Vinyl Project
INTERIOR SIGNAGE
Source: SAWGRASSINK.com

Say it with Style
With sublimation, you can offer customers eye-catching, high-definition signage that won't fade over time, is easy to clean and can stand up to just about any kind of environment. Paper and vinyl signage cannot compare to the quality and versatility that comes with sublimation. You can even get creative with unique substrates, such as acrylic, wood, metal and slate, to diversify your product line and stand out from the competition.
SUBLIMATION METAL PRODUCTS
Source: SAWGRASSINK.com
How To Sublimate Metal Products In A Standard Flat Heat Press

SUBSTRATE EXAMPLES
ChromaLuxe products, photo panels, jewelry, phone & tablet cover inserts, clocks, license plates, signage, pet tags, key chains, magnets, name badges, bag tags.
BEFORE YOU START
This is a guide only, based on production with Sawgrass Sublimation Inks -‐ times, pressures and temperatures will vary and you will need to experiment to find the optimum combination for your production system. Remember that sublimation requires high temperatures so take appropriate care when handling substrates and equipment.
KEY POINTS
- Always read the manufacturer’s instructions for the press and the substrate -‐ settings may vary between brands.
- Metal products must have a polymer coating for sublimation.
- Metals are very thin and highly heat conductive, which makes it possible to place the transfer print on the lower platen and the metal substrate on top if it (the opposite of how most products are positioned).
- Metals are available with white surfaces, silver surfaces or bronze surfaces (dependent on the manufacturer).
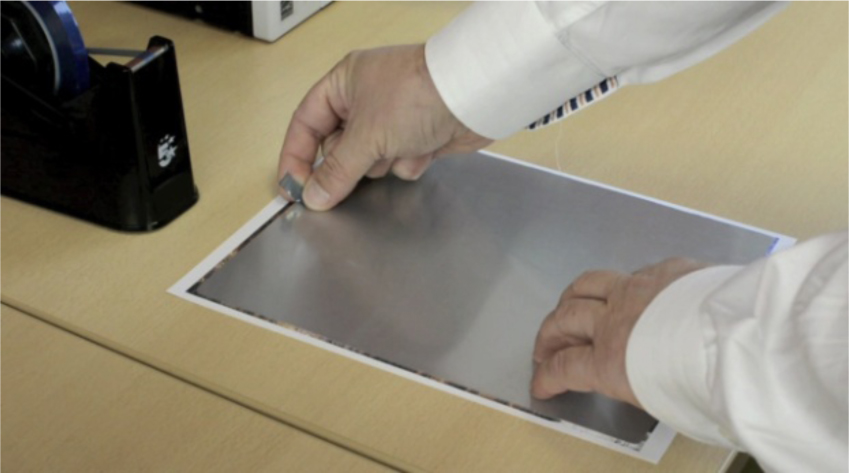
- Most polymer coated metal products have a plastic coating over the printing area -‐ this must be removed before production. A simple method is to hold one edge of the print surface against the upper platen of the heat press for approximately 3 seconds -‐ this will cause the plastic to soften so it can easily be removed.
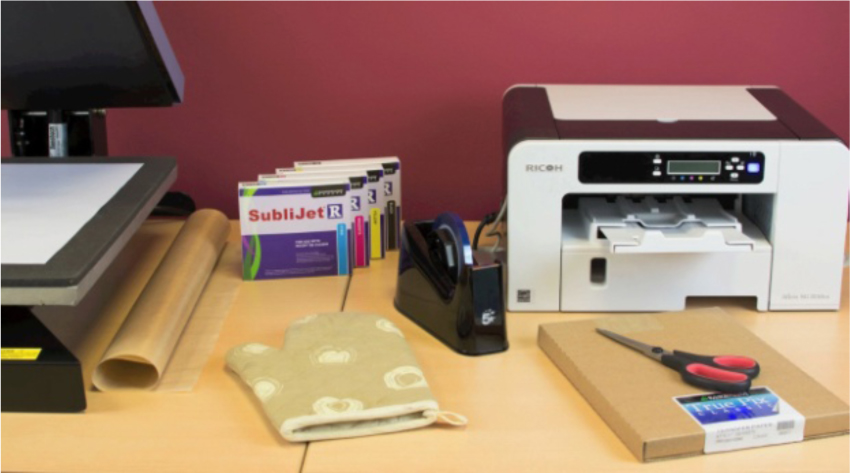
MINIMUM EQUIPMENT REQUIRED
- Sawgrass Supported Printing System
- Sawgrass Sublimation Inks
- High Quality Sublimation Transfer Paper
- Flat Heat Press
- Quality Coated Metal Products (‘the substrate’)
- Protective Teflon Sheet or Absorbent Paper
- Scissors
- Heat Resistant Adhesive Tape
- Heat Protective Glove
INSTRUATIONS
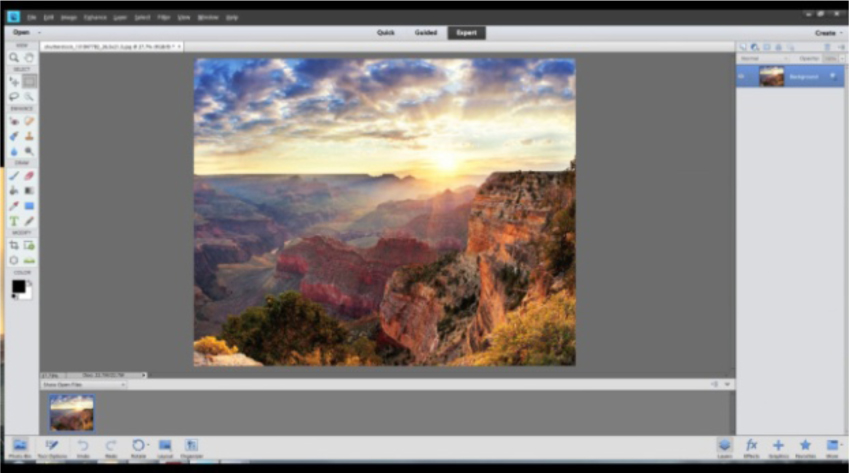
1. Create your image using a standard graphics program in RGB mode. The ideal design and print resolution is 300dpi. If available, use graphics templates provided by substrate manufacturers for exact print sizes. If no template is available ensure the image is created 0.25” / 6mm larger than the substrate.
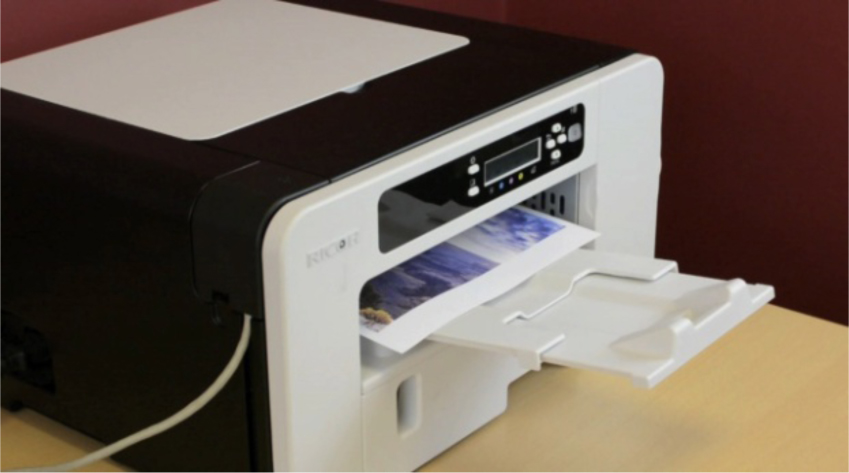
2. Print the image in reverse (mirrored) on to high quality sublimation transfer paper and trim to size if necessary.
3. Remove the protective plastic coating from the substrate.
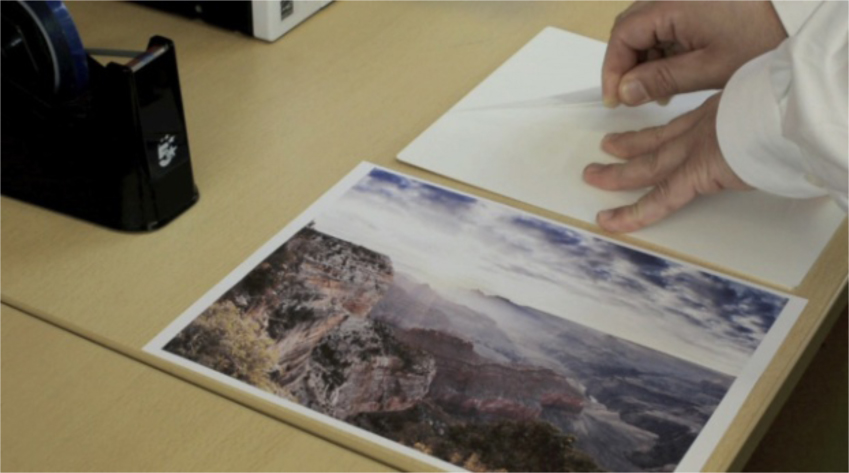
4. Attach the substrate to the transfer print using heat resistant tape.
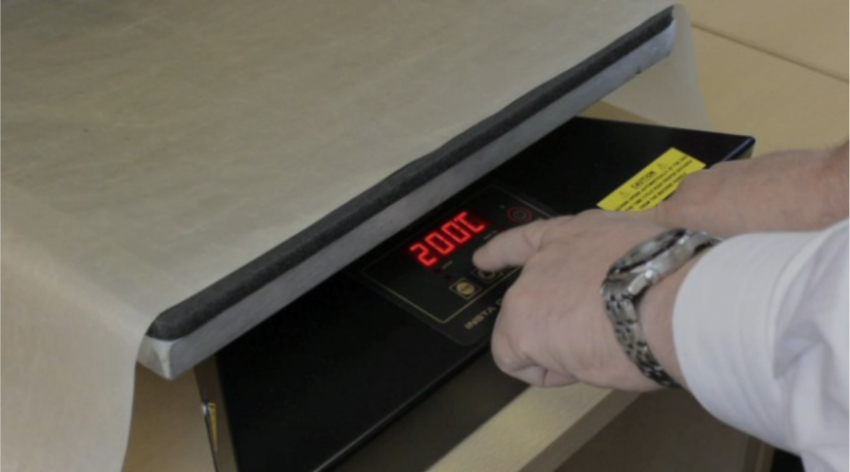
5. Preheat the press to 400°F / 204°C.
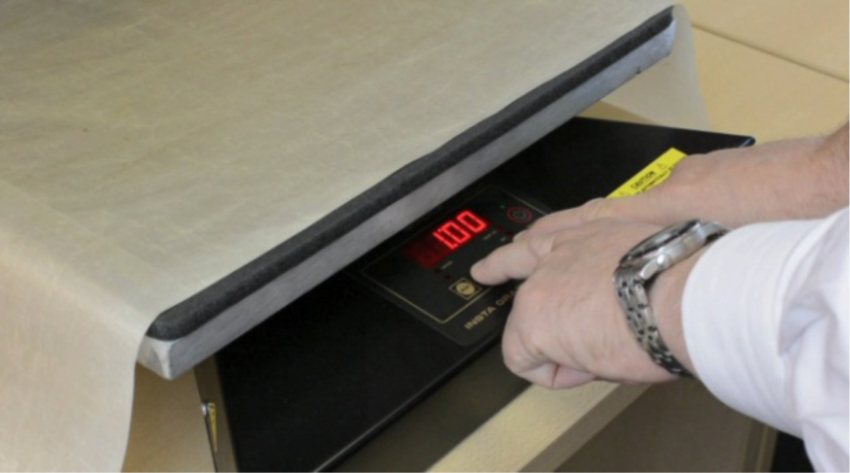
6. Set the time to 1-‐3 minute.
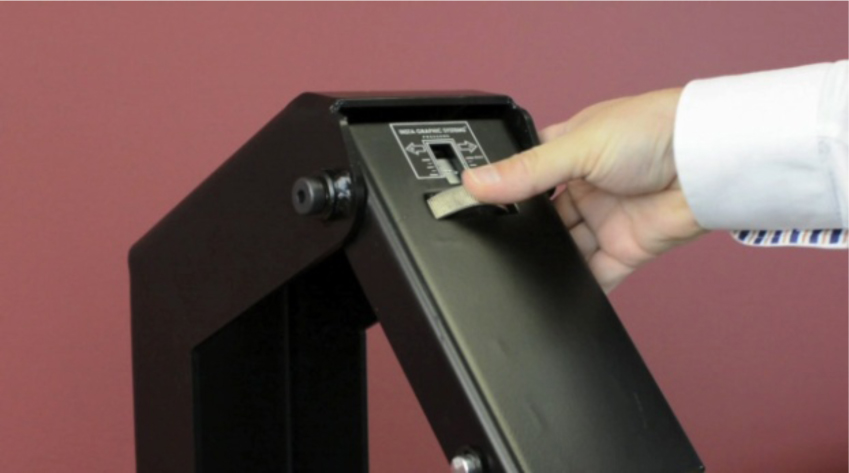
7. Set the pressure to medium (40 psi).
8. Place a clean sheet of absorbent paper on lower platen of the heat press to prevent the excess ink from coming in contact with the press.
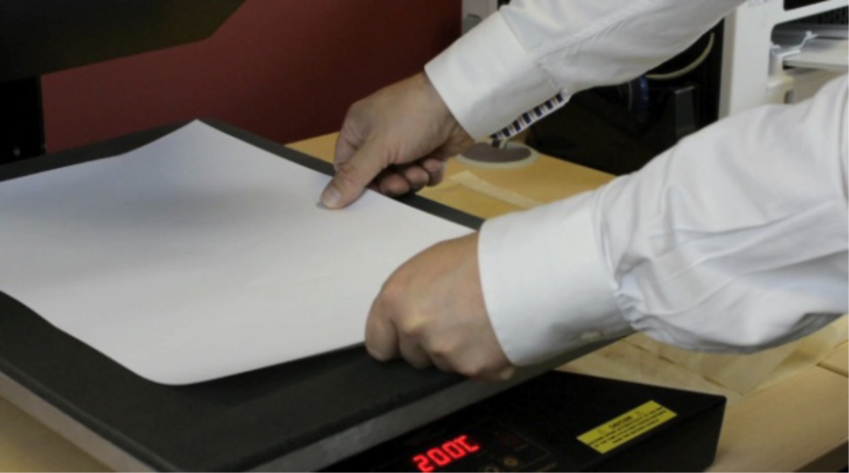
9. Place the substrate onto the press with the transfer image side facing up.

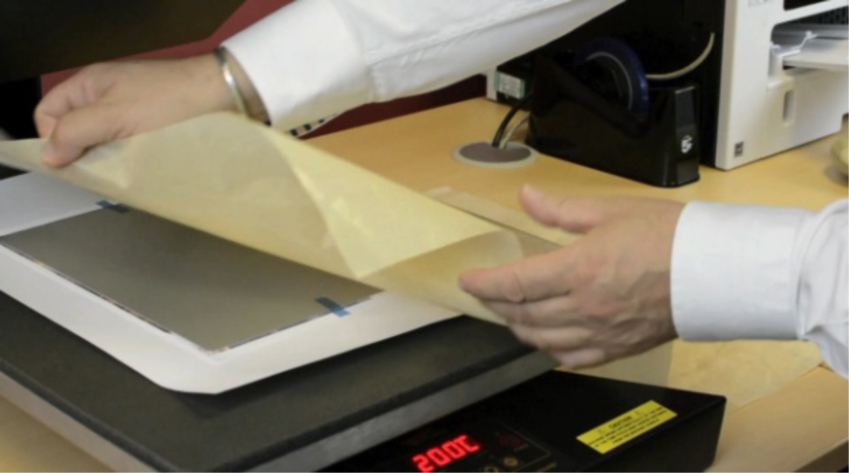
10. Cover with a Teflon sheet to protect the press.
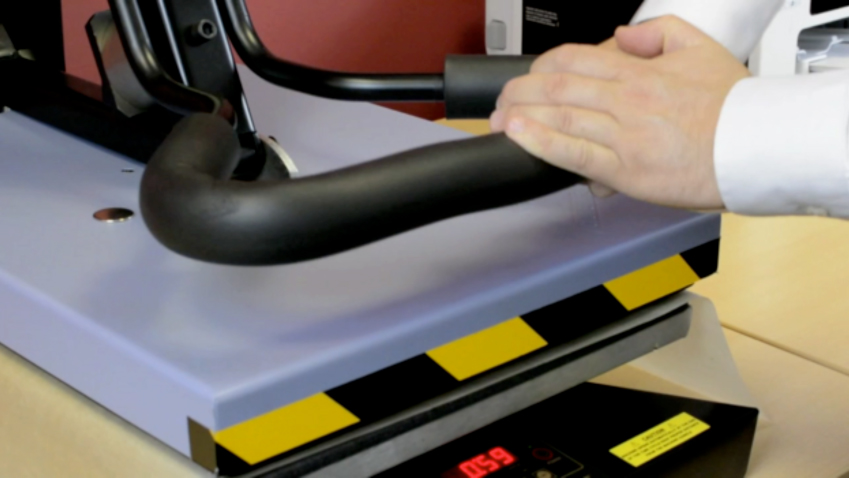
11. Press at 400°F / 204°C for 1-‐3 minutes at medium pressure.
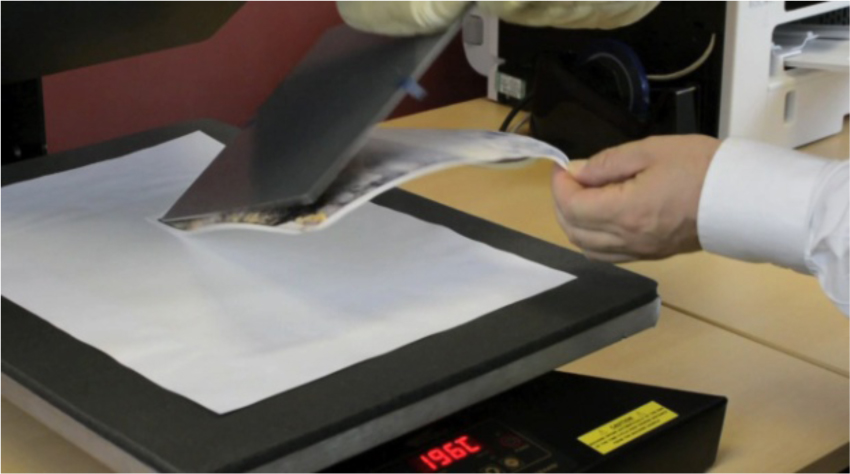
12. Remove the transfer quickly and smoothly to stop the sublimation process. Beware the substrate will be very hot!
13. Cool the substrate in accordance with the manufacturers’ instructions.

RECOMMENDATIONS
- Make a Test Piece. Test your settings for color, temperature, pressure and time.
- Create a Production Reference Log. Make a log of the optimum settings for each substrate for future reference. Include substrate and manufacturer, temperature, pressure and time settings.
FUN & BRIGHT BIRTHDAY STATS CHALKBOARD CHART | A VINYL PROJECT
Source: Silhouette America Blog by Connie Wilson
Hello there! If you are like me and a million other people and you peruse Pinterest on a daily basis, you will see that birthday stats charts are all the rage these days. They come in several different formats. Some people make digital versions that they print and frame, but today I will be showing you how to make your own sign right at home with adhesive vinyl, a chalkboard, and a few other accessories! This project requires quite a bit of steps, but I promise they are easy steps to follow along so don’t be scared ![]()

My beautiful baby girl is having her first birthday very soon. Of course, she *needs* to be cool and hip and have a custom chalkboard chart made, right? ![]() Only half kidding, but I do want her first birthday to be extra special and what better way to highlight her stats and achievements than with a cute vinyl chalkboard.
Only half kidding, but I do want her first birthday to be extra special and what better way to highlight her stats and achievements than with a cute vinyl chalkboard.
As I mentioned above, there are many different ways to make these signs. I chose to do a mixture of vinyl, but also leaving room for me to be able to hand-write some things! I wanted it to be unique and a little different from all the other ones I have seen. The beauty of this tutorial is that I am here to show you the basics on how to achieve this project but you can personalize it in so many ways, so get creative with it–sky’s the limit. Alright, let’s get started!
Here is what you will need:
- Silhouette CAMEO®
- Adhesive vinyl
- Transfer paper
- Hook
- Scraper
- Silhouette 12 in. x 24 in. mat
- Chalkboard (mine is 17 in. x 23 in.)
- Chalk marker
STEP ONE: CREATE AND EDIT YOUR DESIGN
(1) Open Silhouette Studio and adjust your page settings according to the size of your chalkboard. My page settings are at 17 in. x 23 in. to match the size of the board I am using. This is allow me to design everything to scale so that I am 100% certain that it will all fit!
(2) Since we are making a sign that is larger than the CAMEO’s normal 12 in. x 12 in. mat cutting area, we are going to change the “Cutting Mat” to the 12 in. x 24 in. mat. Click on it and the cutting area will be extended.

(3) This step is totally optional but I decided to use a printable chalk pattern from the Silhouette Design Store as a temporary background to be able to visualize the project as we go along. Simply go to Library > My Patterns > chalkboard to add the background.
.
(4) Now that your temporary chalk background is in place, drag it from one corner so that it fits perfectly over the cutting mat area.
*NOTE:* In order to be able to layer your pretty colorful designs on top of the background and not behind, right click on the chalkboard pattern and “Send to Back.”

(5) We are ready to start the design process. This is the fun part. First, I am adding a name. The name will be the center focal point of the chalkboard. I want it to be bold and big so that it pops! Script fonts are my favorite but I find that sometimes they are really thin and often hard to cut–especially on vinyl. But don’t fret! Silhouette Studio makes it very easy to thicken a font. Click on the “Offset” button circled in the picture below. Then, click on the “Offset” option in the drop menu. Use the arrows to thicken the font to your liking. I find that most fonts look great in about .0010 “Offset”, but feel free to play around with it and choose a thickness that works for you. Hit “Apply” and watch the magic happen.

(5) Next, we need to “Weld” our script text so that it is one smoothly connected piece. Right click on the name on your mouse and click “Weld.” You will see that it connected each letter together seamlessly.
(6) After you “Weld” the name, right click on the name with your mouse again, but this time hit “Group” so that the dot on your lowercase i will stay with the rest of the name.

(7) Now we are going to add some color! This coloring step is simply for visualization/design purposes. To add colors to the name (and anything else from here on out) click on the object and select the “Fill Color Window” and now you will be able to choose any color to fill your shapes.

(8) My baby girls’ birthday theme is Bumble Bee’s and all things spring. I have recently been loving daisy flowers so I decided to add two daisy flowers to each side of the name to bring balance. The daisy flower design I liked (design ID# 18035) came in a set of three so I had to ungroup the design to separate the one I wanted to use. Insert the design from your library. Right click on it and press “Ungroup” so that you can delete the other two flowers. Once you “Ungroup,” right click again and “Release Compound Path.” I want to realease the path so that I can delete the inside parts of the flower that I do not want to use because I only want the outer outline of the daisy to remain. Be sure to keep the round center of the flower, that will become the yellow part of the daisy.

(9) Position the daisies on each side of the name and add color to them. First color the petal outline white. Then color the round center yellow and place it over the daisy. Next, I added a fun banner underneath the name.
*NOTE.* The banner file comes free with the CAMEO software so be sure to look for it in your library.

(10) Using the text option, add First Birthday, position it, and color it in.
(11) Now that we have the top portion done, we are going to work on the borders that are going to separate the different stats sections. I chose to use a heart border for the larger boxes and a plain rectangle to create smaller sections. To create the rectangle shape, I free-handed a rectangle shape using the “Draw a Rectangle” option on the left menu circled in the picture below. Drag your mouse until you have the shape. Make a few of them, depending on how how many sections you want!

(12) Arrange the rectangle bars on the board. No rules here–just space them in accordance to how wide you want each section to be. For example, I want my “I love” section to be the largest, so I will space it wider than the others (i.e. the bottom left in the picture below).

(13) Ok just a few more designing steps and we can cut. Yay! I found the cutest tooth file in the Silhouette Design Studio. I wanted to use the outline of the tooth only so I had to adjust it a bit, since the tooth file comes with eyes and a smiley face–very cute but not what we need for this project. Open up your library and click on the tooth file to add it into the design space. Right click on the tooth and choose “Ungroup” so that we can use the bottom tooth.

(14) In order to create the outline of the tooth, we will need to create an “Offset” with the shape. Find the “Offset” function (circled in the picture), click “Offset” and change the offset distance to 0.188, or more/less depending on how thick you need it to be. Click “Apply”. Lastly, right click on the two “offset” teeth and “Group” so that is one object and not two.

(15) Our board layout is complete. Now time to add the finishing touches. Using the text box, type the phrases that correspond with the type of stats you want to highlight on your chalkboard! I chose to include: teeth amount, weight, height, things my daughter loves, things she dislikes, nicknames (we have a million!), and words she can say. Time to C-U-T! But first, pat yourself on the back for following along this far. You are the real MVP.

STEP TWO: CUT YOUR DESIGN
We are ready to cut out our the designs!
(1) Now that we are ready to cut, we need to get rid of the temporary chalkboard background. Simply click on it and delete it.
(2) Because our original page settings on the Studio Studio were reflected to match the size of the chalkboard, we need to change it back to the mat cutting size area, which happens to be 12 in. x 24 in. Click on the “Design Page Settings” icon circled below and adjust the page settings.

Organizing your items to cut by color
(1) I wanted the chalkboard to be super bright and colorful, which is why I chose to use a ton of different colors.
(2) Move all the items off of the cutting area so that you can chose the items you want to cut in the same color group. In the picture below, I am cutting all of the pink items!

(3) Load your mat with your adhesive vinyl and adjust the cut settings in the Silhouette Studio to the “Cutting Settings” for “Vinyl–Silhouette Brand.” Don’t forget to manually adjust the blade on the machine, or you will be really sad!


Here is a tip for the longer pieces: For example, First Birthday is longer than the cutting area width will allow. To fix this, click on the item until a green dot icon appears. Simply use that green icon to rotate your item vertically so that you can take advantage of the extra length the 12 in. x 24 in. mat provides.

(4) Repeat the process with every color until all of your pieces are cut.
STEP THREE: PREPARING THE VINYL FOR APPLICATION
(1) Our first step is the weed the negative spaces in our designs (i.e. the pieces that we do not want to transfer) using our nifty hook tool.

The pieces should all look like this when you weed them. Such pretty and vibrant colors!

(2) The next step is to prepare your transfer paper. In order to transfer the adhesive vinyl over to the chalkboard, we need to peel the white backing off of the transfer paper. You should be left with the sticky grid side, as shown in the picture below.

Place the transfer paper above your vinyl piece. Make sure the entire vinyl area is covered!

Take your scraper and run it across the entire design. Don’t be afraid to press hard!

Once you have scraped it, peel the grid transfer paper away from the vinyl carrier sheet. Now you will be left with the vinyl design on the grid transfer paper.

STEP FOUR: APPLYING THE VINYL TO THE BOARD
This is my favorite part–getting to apply the pretty vinyl pieces to the board *HAPPY DANCE*.
(1) Begin applying the pieces to the board. I started with the name first, since it is the center piece. Place the design where you want it and use your scraper to press the vinyl onto the surface of the chalkboard.

Peel the transfer paper away to reveal the pretty vinyl laying securely on the chalkboard.

For the daisy flower, first lay down the white petals to the board, then layer the yellow centers on top. Add the banner below and repeat until you have all the items on your board!


Remember when I mentioned that I chose to leave room for me to hand-write items in chalk? Well, here it is! I love the mix of vinyl and real chalk marker on this board. It really gives it a cool look!

We are done! Stand back and admire your beautiful work. This board is sure to be a hit at any occasion. I can’t wait to see this board on display at my baby’s first birthday party.

Have tons of fun creating! XOXO!
PRO TIPS:
*The beauty of vinyl is that it is durable enough to last for years and years but gentle enough to remove if need-be. If you make a mistake, do not worry! Simply peel the vinyl off with your hook tool and replace the piece.
*If you are having a tough time getting your designs on straight, use a ruler and chalk marker to help you draw lines and guides. Chalk is super easy to erase when you are done.
